Internal boundaries
The geometrical consistency of the surfaces is important for the application to flawlessly execute segmentation. For this, it is recommended that a tri-mesh consists of a single patch.
An internal boundary is formed when a tri-mesh contains a gap, which is the case when the edges of one or more triangles are not connected to other triangles (except, off course, at the outer edge of the tri-mesh). Internal boundaries are not always visible by the eye. Although the structural modeling and meshing algorithms can deal with some degree of gaps, larger gaps may cause artifacts, e.g. a horizon which has been connected 'through' a fault, where that fault should actually offset that horizon. Artifacts can have implications on the geometry of the resulting structural model (and subsequently the 3D grid) or 3D mesh, and affects volume calculations, segmentation and compartment analysis. The reason for gaps to appear in tri-meshes can be numerous. They can be a result of the resampling, the triangulation process or they can be introduced by error. For a quick check on potentially existing gaps in tri-meshes, the test Internal boundaries identifies the internal boundaries and reports them back as found issues, which can be viewed in the dedicated Diagnostic View. Note that fault gaps in structural model horizons, when they are watertight in the respective horizon-fault combination, are recognized by the diagnostic tool as 'correct' and will not be flagged as internal boundaries.
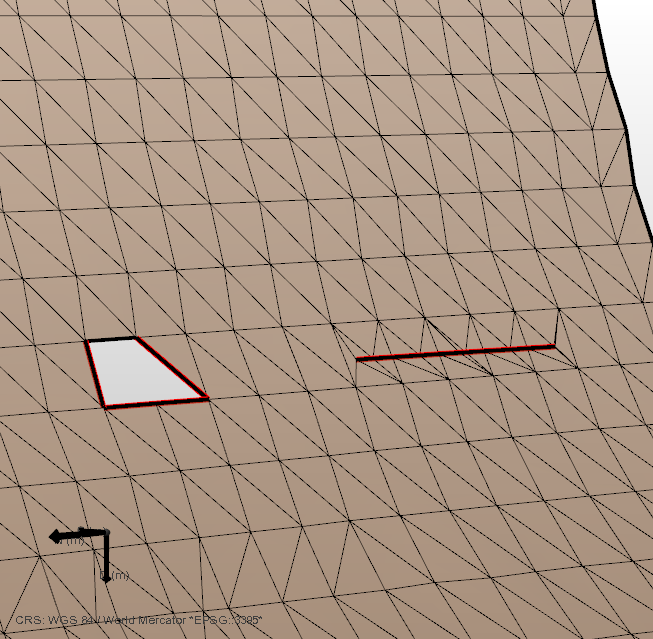
Both a gap (left) as well as an internal cut (right) are picked up by the 'Internal boundaries' test. click to enlarge
Solving the issue using the (editing) tools
The internal boundaries do not necessarily lead to artifacts (except when you are creating a 3D mesh structural model, for which requirements are more strict). However, removing the gaps will generally improve the robustness of your model. In most cases the easiest way to remove the gaps is to use the editing tools directly on the tri-mesh.
Use the Fill Hole  tool, click in the direct proximity of the gap and rerun the test to check the results. The result of the application of the Fill Hole tool is shown below. Please note, that closing internal cuts may introduce elongated triangles.

Previous gaps and internal boundaries have been filled using the Fill Hole tool. The location of the internal boundary on the right has some flat triangles, which should be removed before moving on. click to enlarge